Taking good photos of wildlife can be hard, especially birds, as they often move in three dimensions. The right equipment certainly helps, but like most photography, it’s never just about that.
Composition and storytelling
Whatever equipment you have (and I’ll get to that), the first thing to think about is trying to be at eye level. You’ll find that it’s not often an image that will work if you’re shooting up or down.
Secondly, try and make sure the eye (if visible) is in focus. A lot of new cameras come with “animal detect eye autofocus” for this very reason. An eye out of focus will generally ruin an otherwise good image, no matter what else is captured.

Thirdly, try to tell a story. Whether it’s showing where the bird is, what it’s about to do, what it is doing or what has just happened, great bird (and all wildlife) images usually tell some type of story.
When and where
If you want to capture the beautiful fine details of their feathers, generally the best time is when the light is “soft”. This normally means either when it’s cloudy or the birds are in some shade.
And where is the best place? Well that depends upon the story you hope to tell, but the wonderful thing about birds is they are everywhere. You just need to look, listen and be a little patient.
Quick Guide
How to vote in the 2021 bird of the year
Show
Fifty birds. Two weeks. Only one winner.
The voting system in 2021 has changed. The competition kicks off on Monday 27 September with a lineup of 50 Australian native birds. The bottom five birds are eliminated at the end of each weekday, with everyone able to vote again in the next round each day. You can vote again on the 45 most popular birds and so on. You have one vote each day, but it doesn’t have to go to the same bird. Eliminations will be paused over the weekend when the vote count will be hidden. Voting will go dark on Thursday 7 October for the final 10 birds and voting will close at midnight. All votes from the early rounds are discarded before the final count. The winning bird will be the one that receives the most votes in a simple poll of the final 10 on Thursday 7 October. The winner is announced on Friday 8 October.
Equipment
One great thing about mobile phones is that most people always carry one, so they can capture spontaneous moments. Spookily, as I sat editing this article, some sulphur-crested cockatoos came and sat on the table outside my window, looking in. With my old mobile, I could easily take a shot. Sure, it’s not the best image I’ve ever taken, but hey, it tells a story, and that’s fine for social media.

But if you want to get into serious bird photography, as a general rule, some type of sports camera is the way to go – one that will focus quickly and shoot a lot of frames per second. Combine that with a long zoom lens (say 100-400mm) and you’re pretty good to start.
And why a zoom?
Well, you usually don’t know how far away you’ll be from the bird, and unless you have the money to buy and the ability to carry a whole lot of fixed focal length heavy lenses, a zoom allows you to compose easily and quickly in the field and are easy to carry.
Settings
Once you’re ready to shoot, your settings will basically depend on what the bird is doing. Regardless of this, I always suggest taking creative control of your shutter speed and aperture and manage your exposure by setting the ISO to “auto”. I know this will be heresy for many bird photographers who strive for the least grainy image possible, but in my mind, who cares about a bit of grain if you get the perfect shutter speed and depth of field – that’s what helps tells the story.
And what should those shutter and aperture settings be?

If the bird is in flight and you want to freeze the moment, I’d suggest a shutter speed of at least 1/1500th sec, a f-stop starting around 5.6, and your autofocus set to continuous. Having said that, you don’t always have to use a fast shutter speed and freeze the moment. Sometimes by slowing things down you can get some really creative results.
But if the bird is stationary, then it’s a simple matter of how still the bird is, how still you can hold your camera, and what f-stop will give the best results to tell that all-important story I mentioned. The focus mode here can be whatever you want; I normally go for single autofocus.
Final thoughts
At the end of the day, there are so many types of cameras, lenses and settings that will allow you take great bird images. What you get depends on …. well so many things … but if you’re starting out, these tips should be a good place to start. What’s most important however, is to get out there, play around, see what works (and what doesn’t) with what you have, and always be ready with some camera in hand.

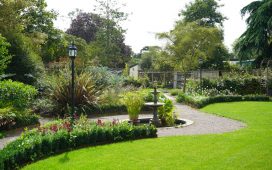
Note: I nearly always have my camera with me. This image (above) was taken thought the open doorway as I sat inside on a rainy day writing this piece.